I set out to build my own smart home controller after my previous hub’s manufacturer switched to subscription on one week’s notice. I chose to run the open-source Home Assistant on a Raspberry Pi 4 device. Once I received the device the first task was to set up the hardware and boot the device running the hassos operating system. Once the OS is up and running, I’ll be able to configure Home Assistant and start talking to devices.
The RasPi 4 is literally just a chip board; to do anything interesting you need various accessories. I ordered a kit from Vilros which came with everything you need to set up a RasPi4 device – except for an SD card.

Hardware setup
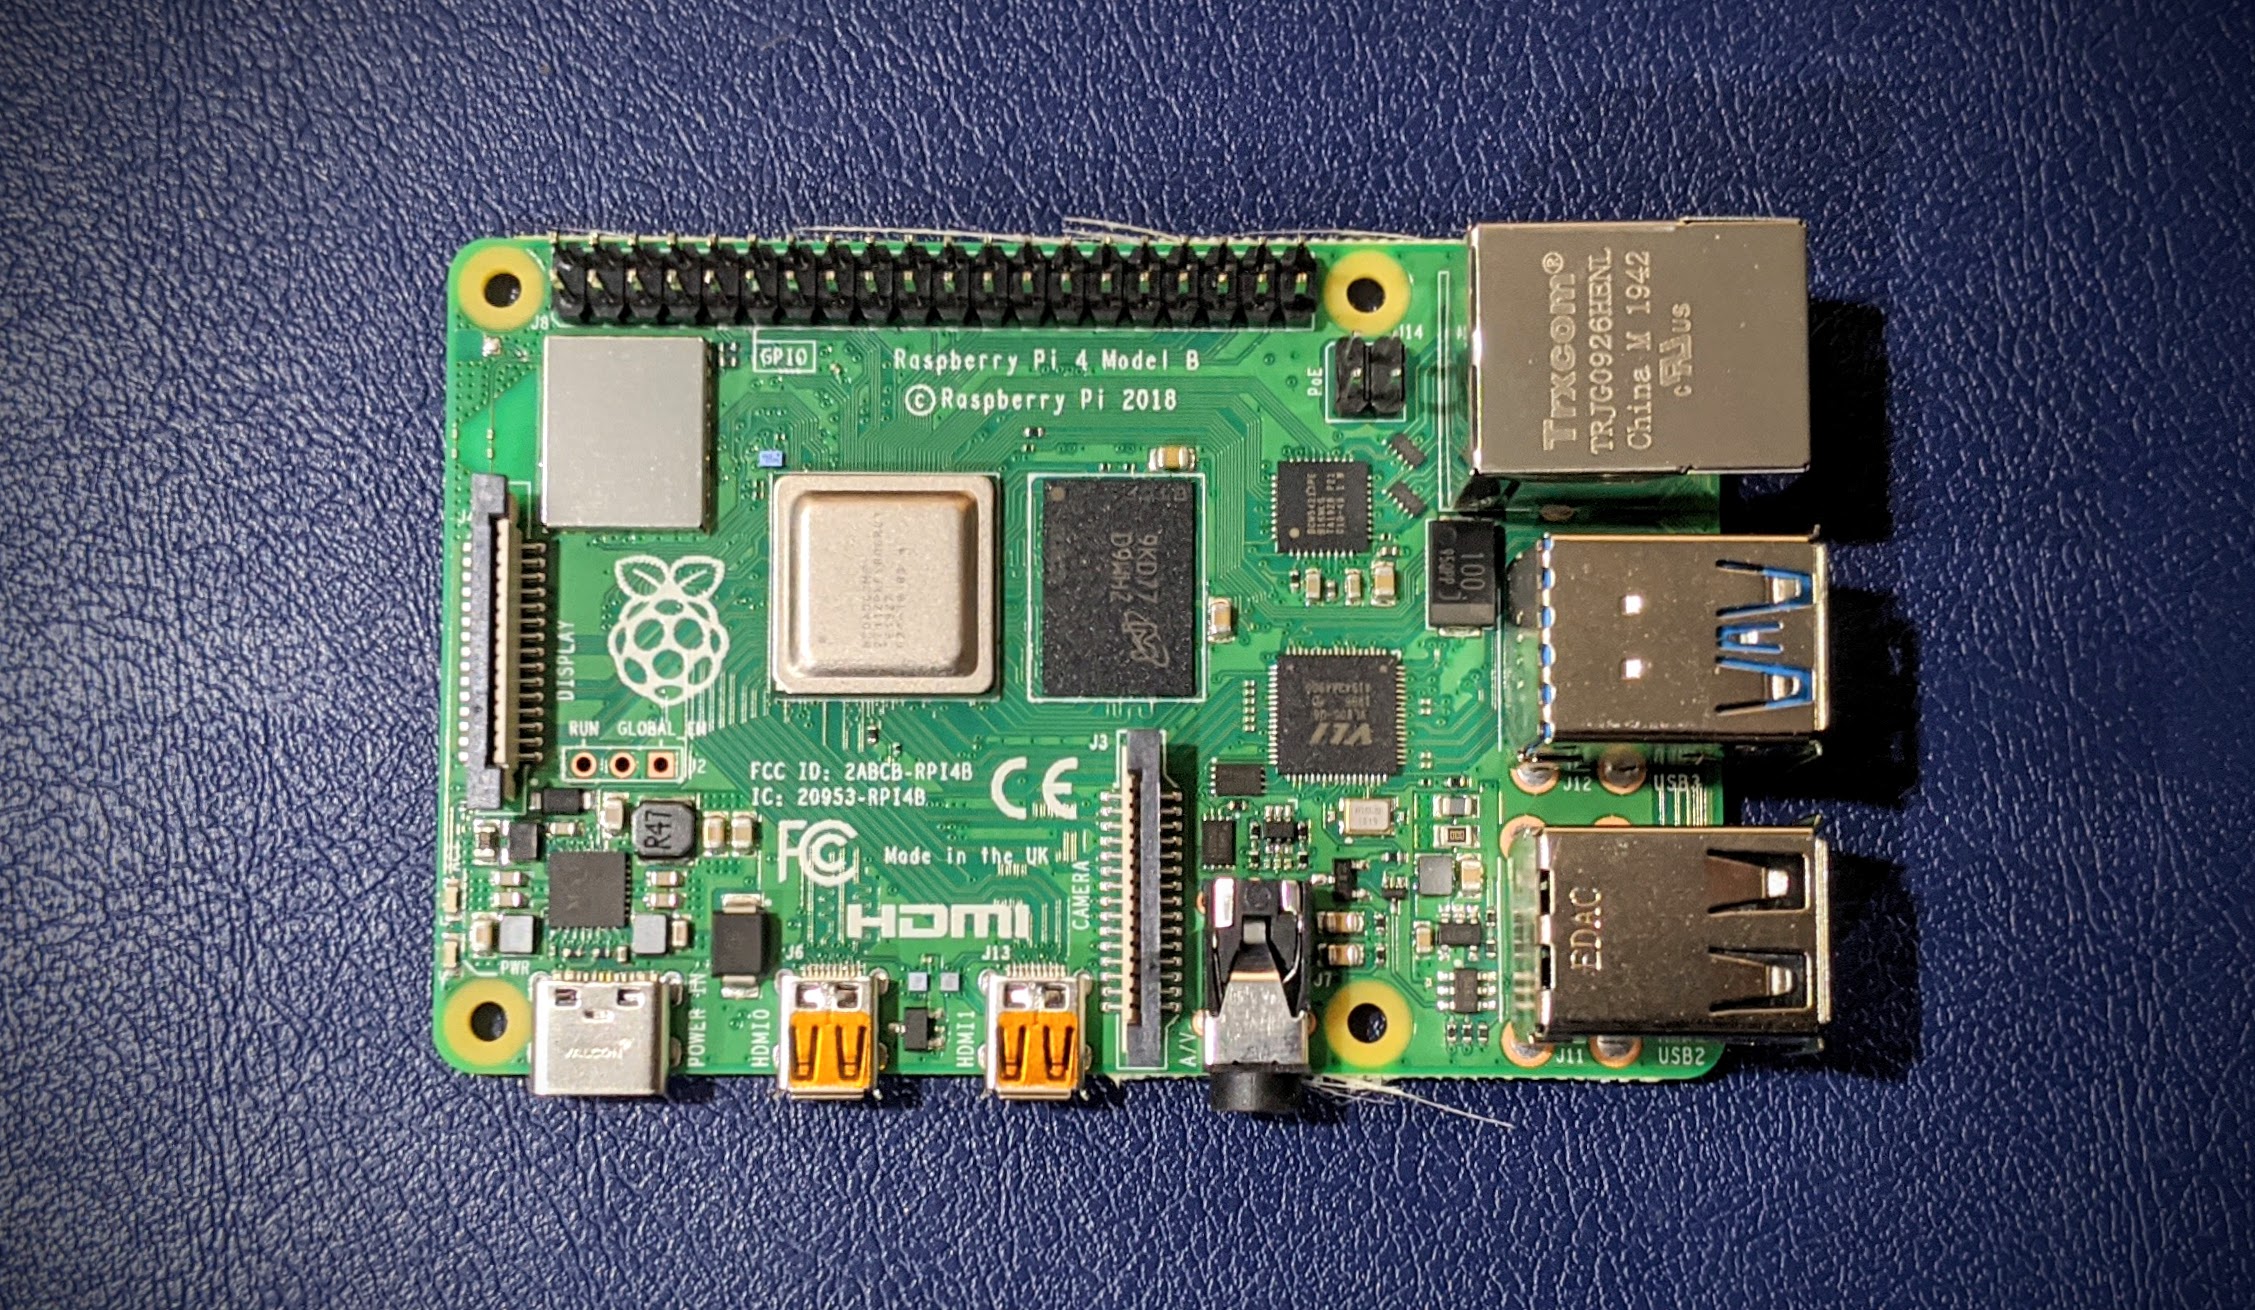
Here is the device, out of the box. It’s really small, about the size of a credit card.
Computer chips generate heat as they work. Computers sometimes only need passive cooling (like a smart phone) but often also use a fan for active cooling. Efficient heat dissipation is difficult so to keep costs low, the RasPi4 needs cooling. The kit came with heat sinks and a fan; turns out both are necessary for normal operation.
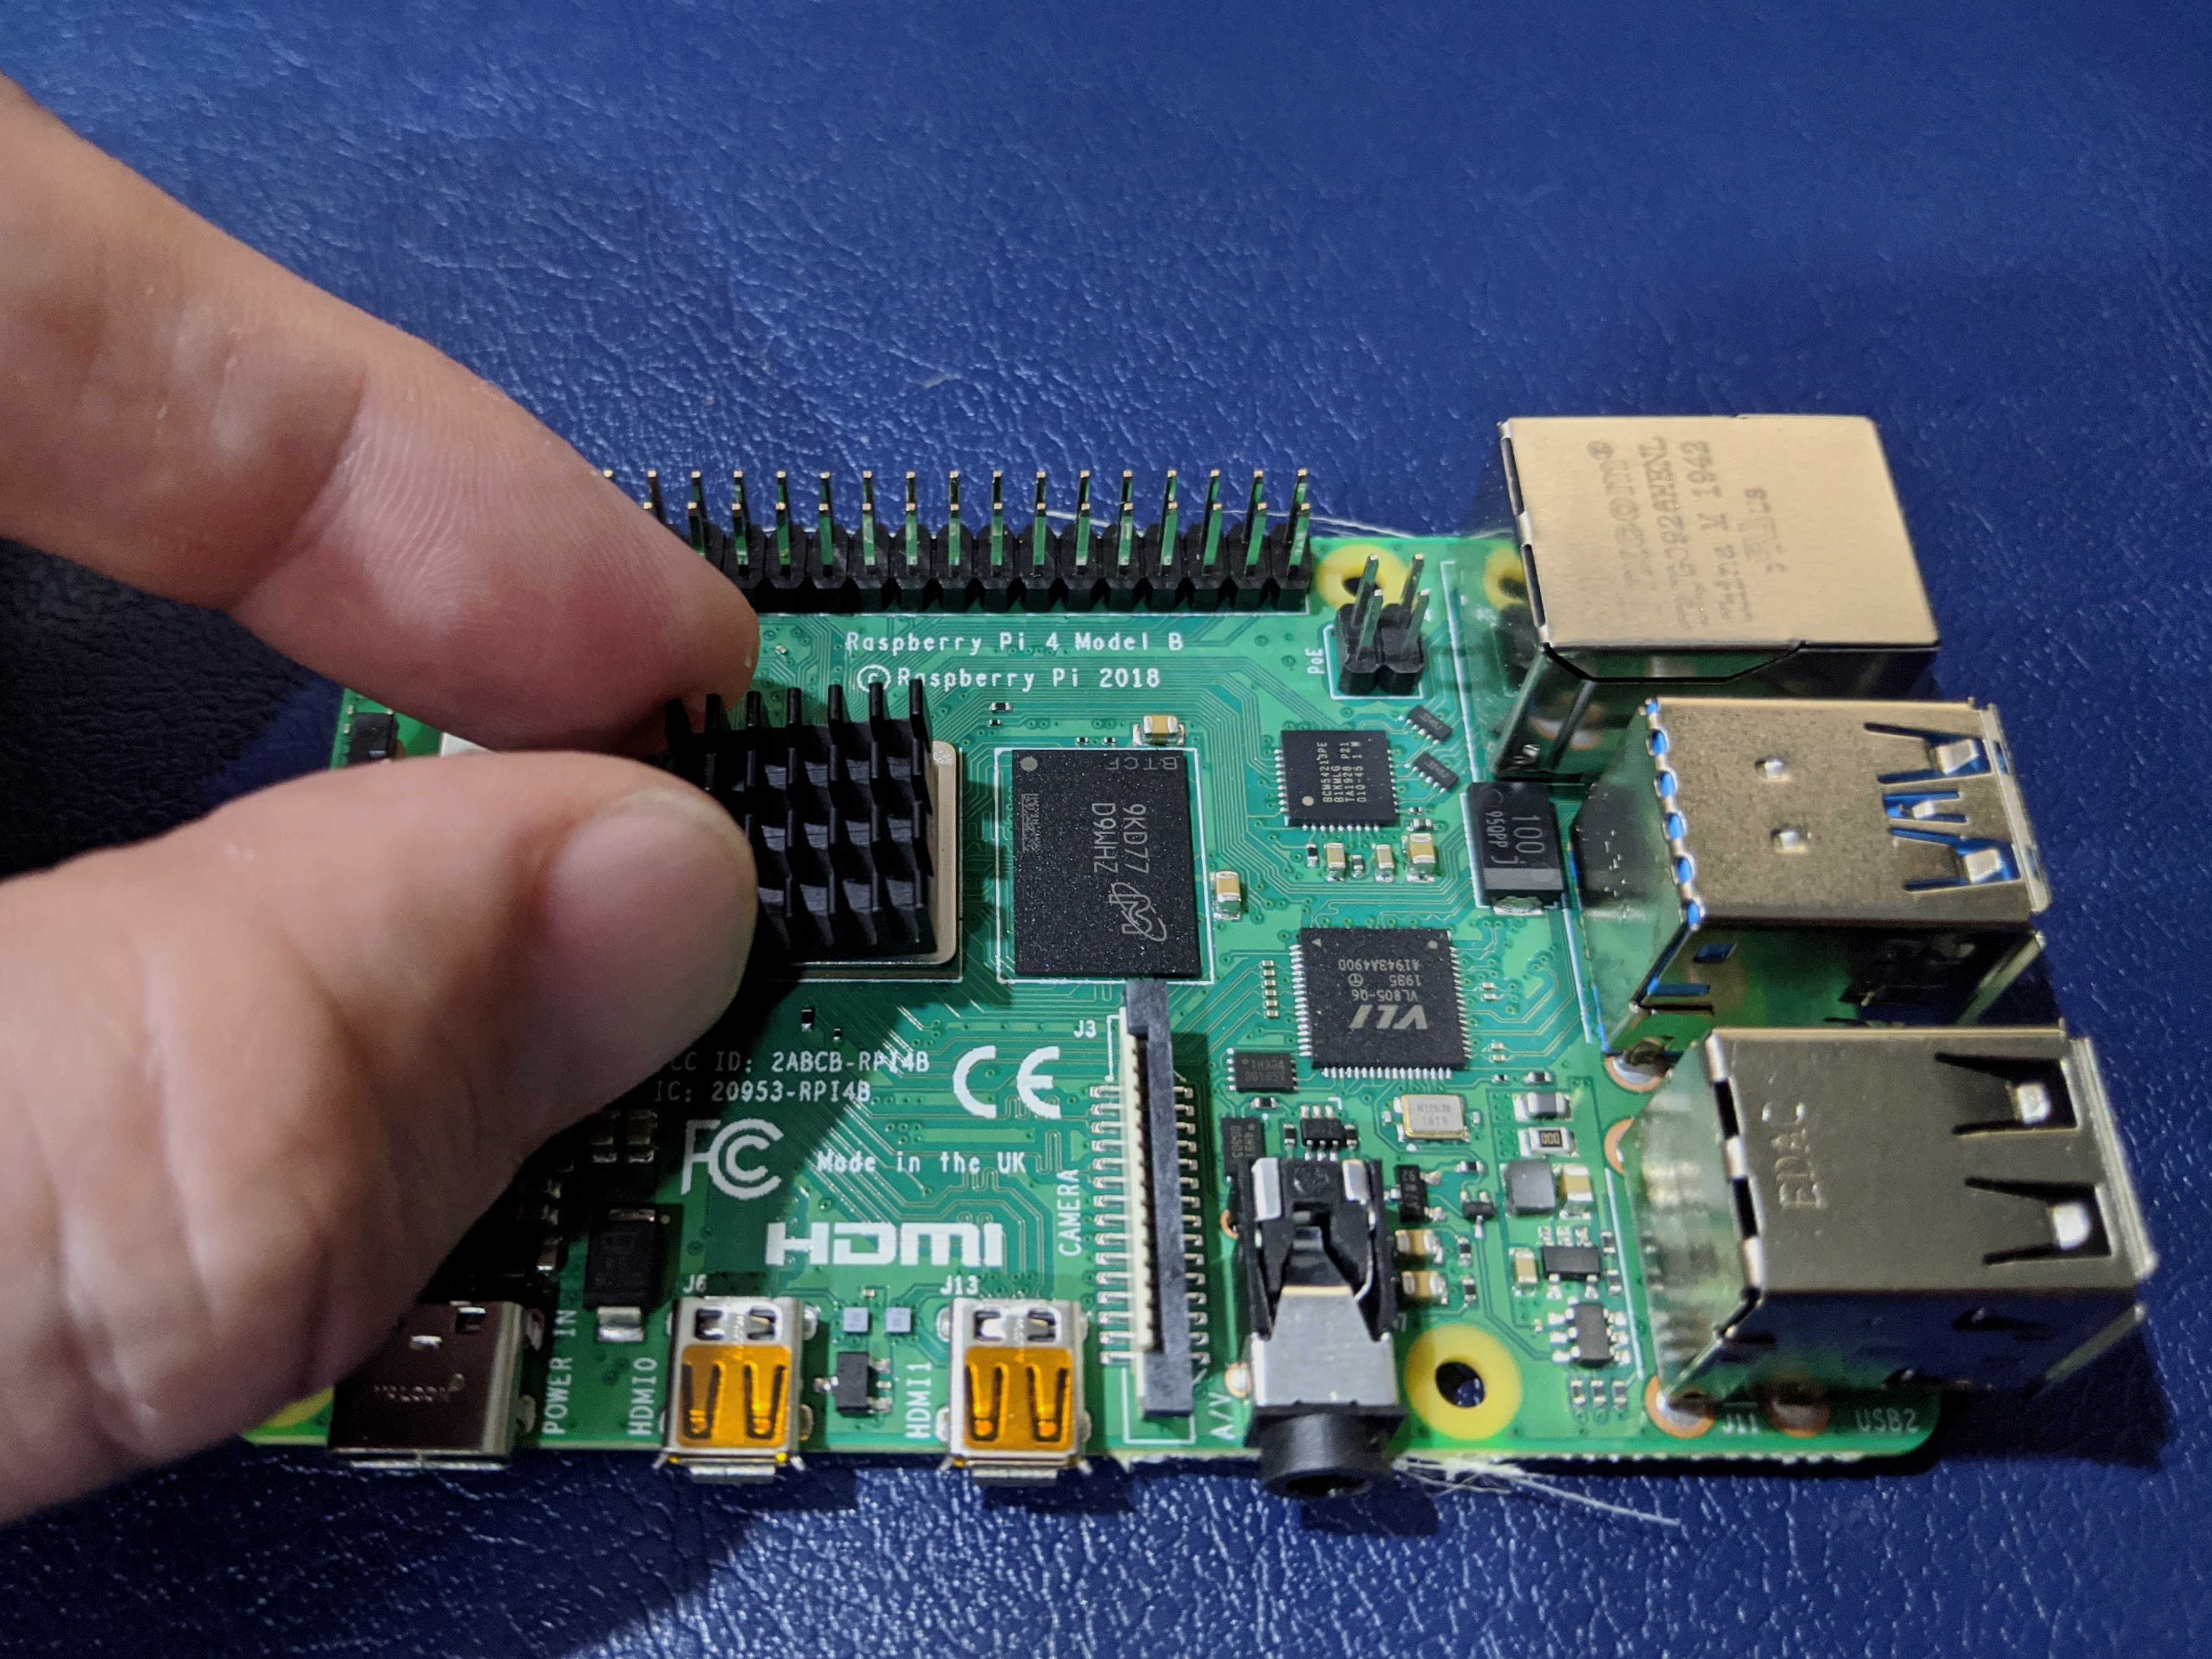
So let’s install the heat sinks. Heat sinks are spiky metal pieces shaped to favor heat absorption at point of contact (the chip) and heat dissipation into the air. These sinks came with peel-off thermal paste adhesive, a special kind of glue that conducts heat. It was easier than spreading paste from a tube like for some desktop processors, but getting the tiny heat sink onto the tiny chips was a bit challenging for my hands. Maybe I shoulda used tweezers. 🤷🏻♂️
Here’s a close-up of the device with heat sinks on the four hottest chips: the CPU (left), RAM (middle), and on the right, the network (top) & USB (bottom) controllers.
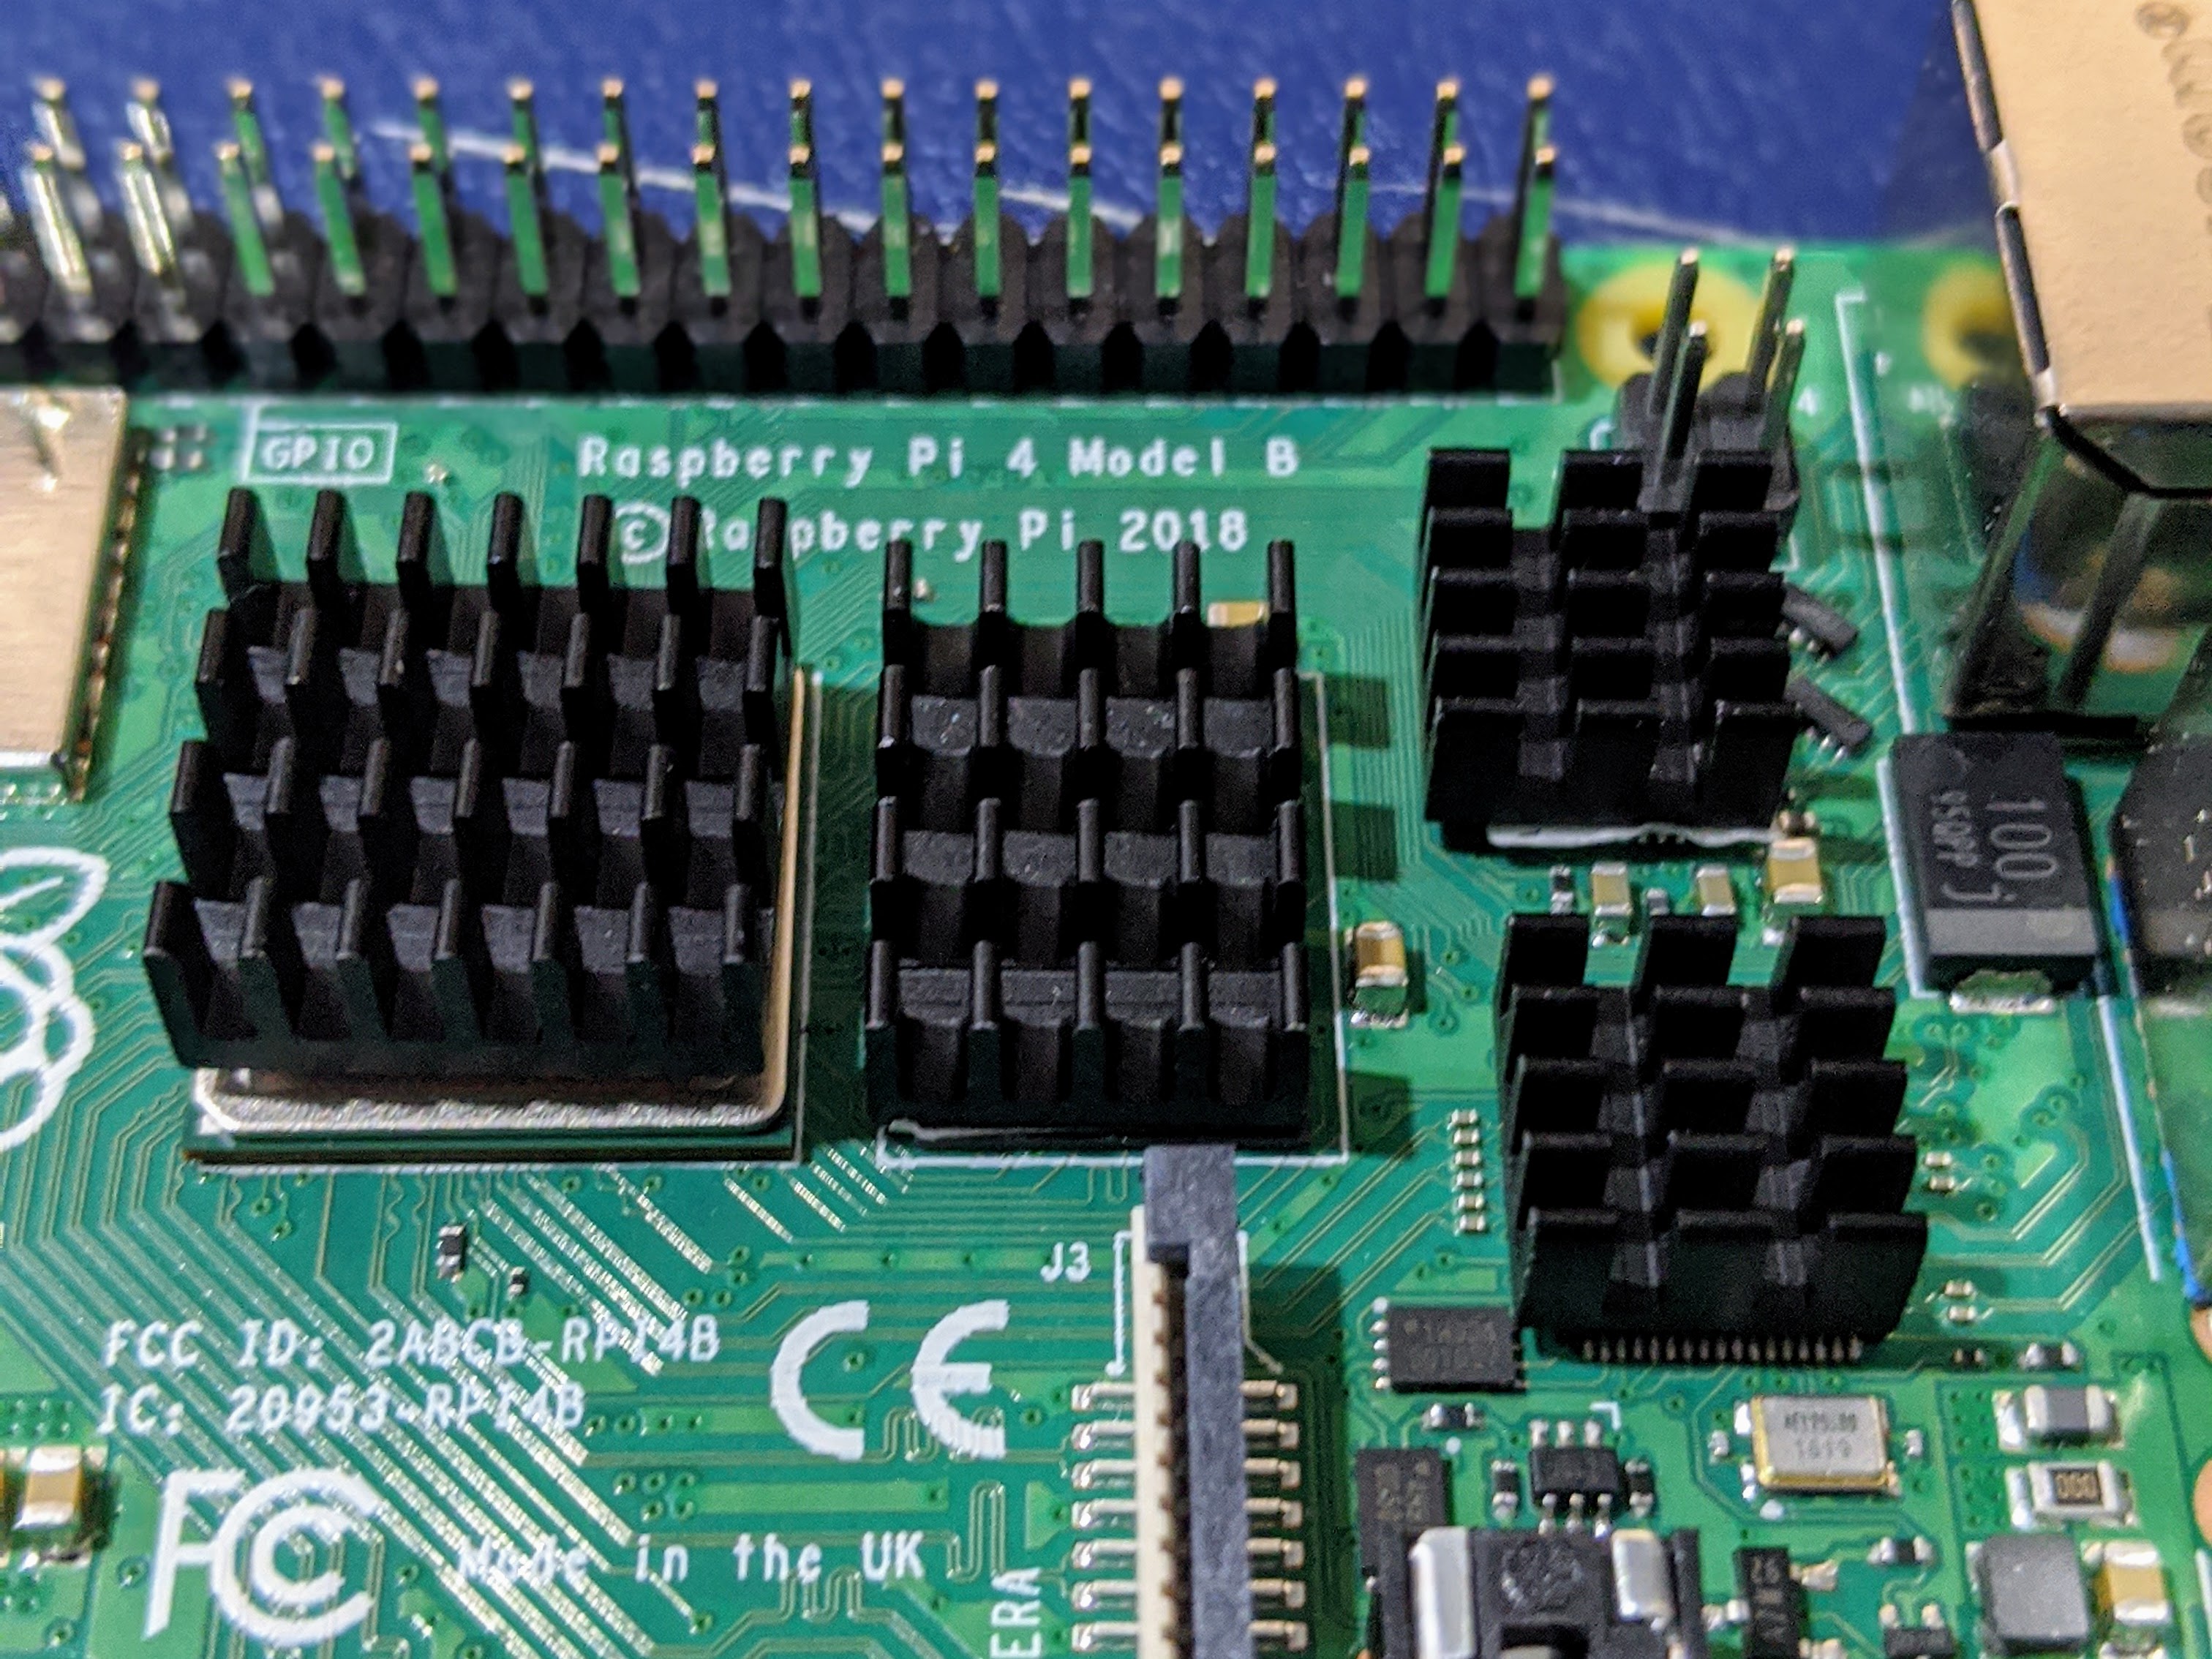
all 100% perfectly squarely installed, mm-hmm
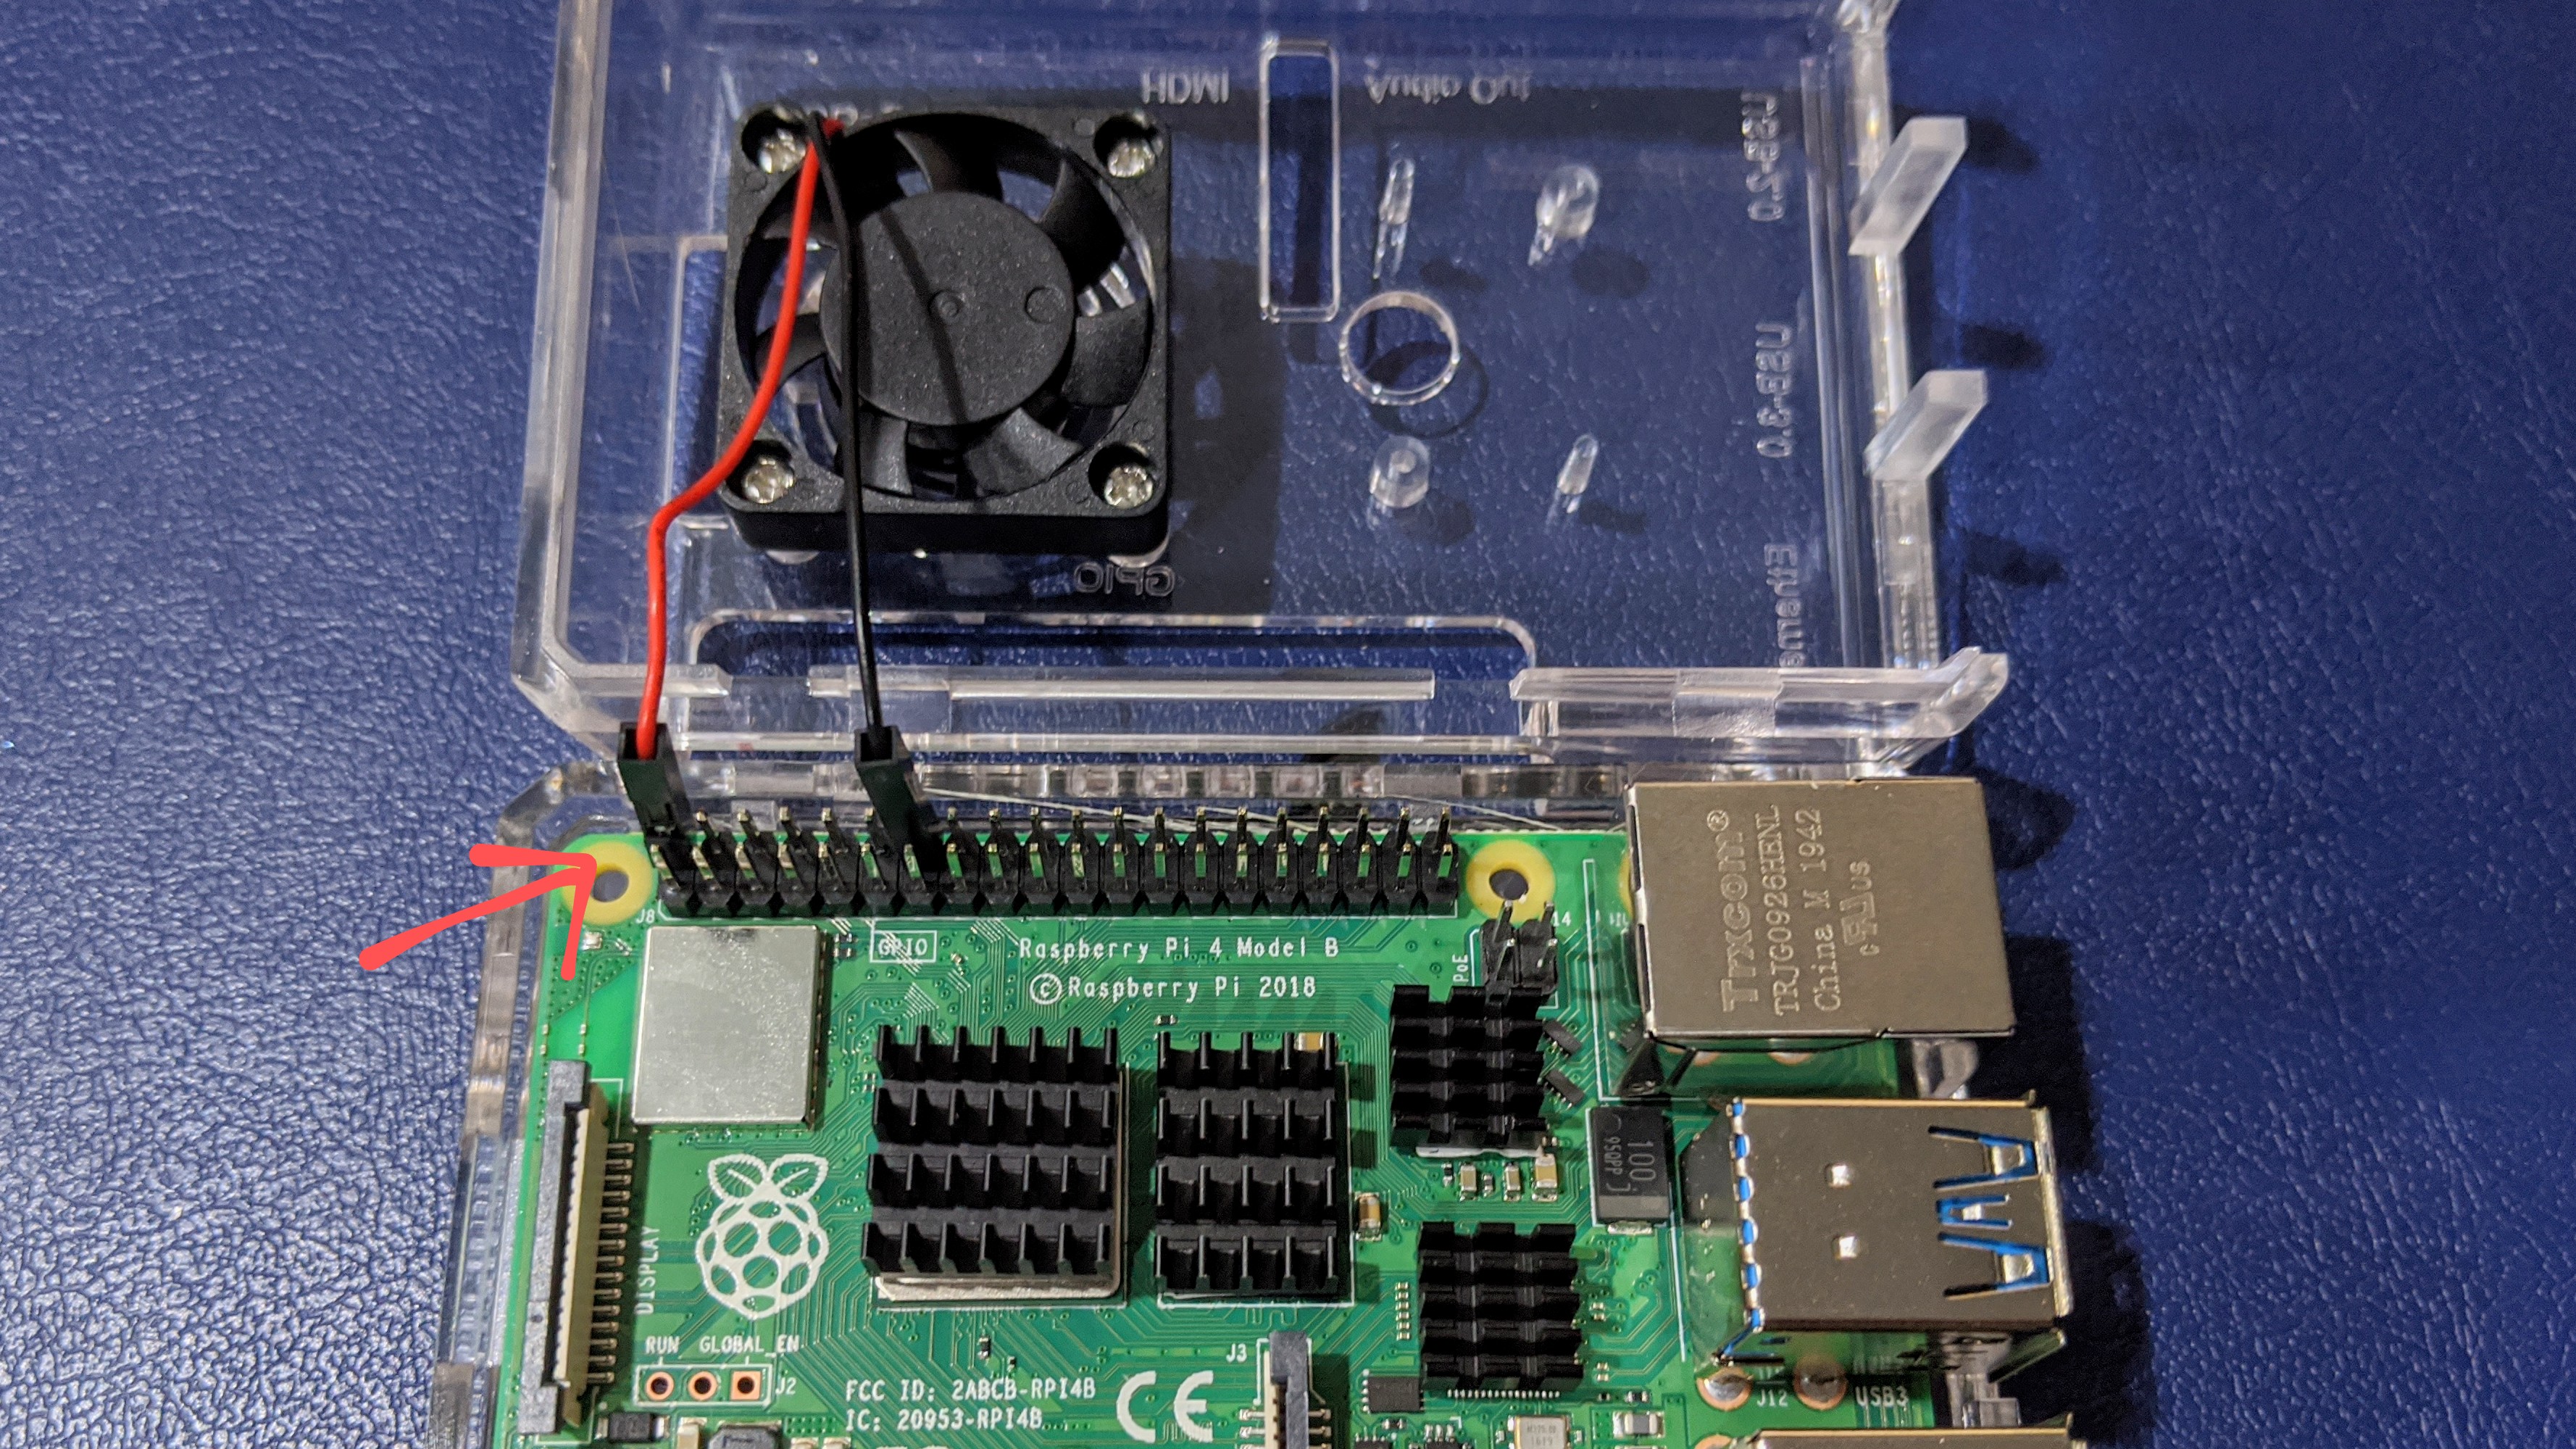
Next, I placed the board into the bottom half of the case. The top half of the case came with a fan; its two wires fit into the general-purpose input/output pins (GPIO). The device provides different voltages to these pins which lets it power or even communicate with attached devices. The fan just needs power: the black wire goes to ground (neutral, 0 volts) on pin 14, and the red wire goes to either 3.5 volts on pin 1 or 5 volts on pin 2.
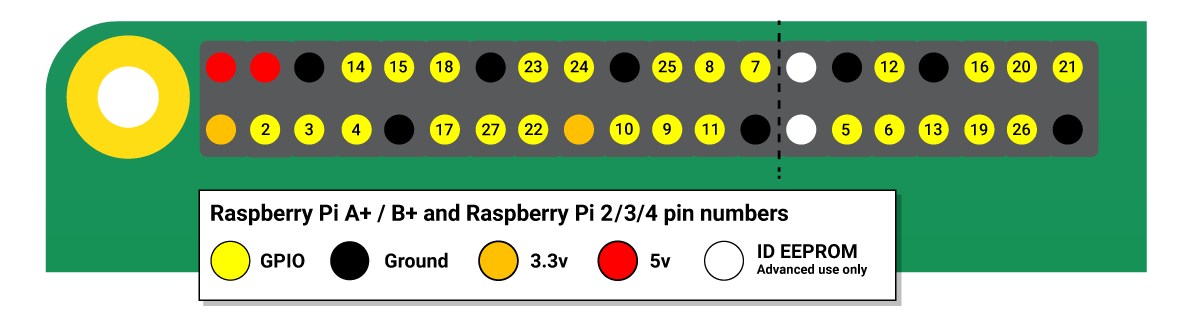
source: raspberrypi.org)
I wasn’t sure if I needed the full fan speed or the quiet mode at 3.5V. I figured I’d start with full speed and figure it out later. Here is the fan in the top half of the case connected to the 5V setting (higher fan speed).
We’ll come back to the fan speed later; now it’s time to close up the case and work on flashing the operating system onto the SD card.
Booting the operating system
The RasPi4 runs off of a tiny “hard drive”, a micro-SD card. It’s kind of like the storage smart phones use. To get a Pi to do anything interesting you need an operating system on the card. Home Assistant provides pre-built OS images on their installation page. I picked the RasPi 4 Model B 32-bit image, as recommended.
Then per the instructions I wrote the image to the SD card using balenaEtcher. It’s the coolest SD card flasher I’ve seen and far beats twiddling around with command line tools.
The main thing you’ll need here is a way to connect the micro-SD card to your computer. The SD card I bought comes with a standard size adapter that fits into most card readers. I happened to already have a USB-C hub with an SD card slot ($23 on Amazon).
A little bit later, I had a micro SD card with the Home Assistant operating system & software loaded up. I plugged in the power adapter, connected it to my monitor via the HDMI-mini adapter, and soon thereafter saw a terminal window. Ah, the good old days of watching Linuxen boot in the terminal…
So, yeah, you can’t do much without the web UI. And it turns out that setting up Wi-Fi is quite an involved process so I plugged in an ethernet cable for now. These are the rough edges of open-source projects.
Connecting to Home Assistant in the browser
Thanks to modern networking, the Home Assistant’s address is just http://homeassistant.lan:8123. That’s nicer than an IP address. The docs say homeassistant.local:8123 which didn’t work for me.
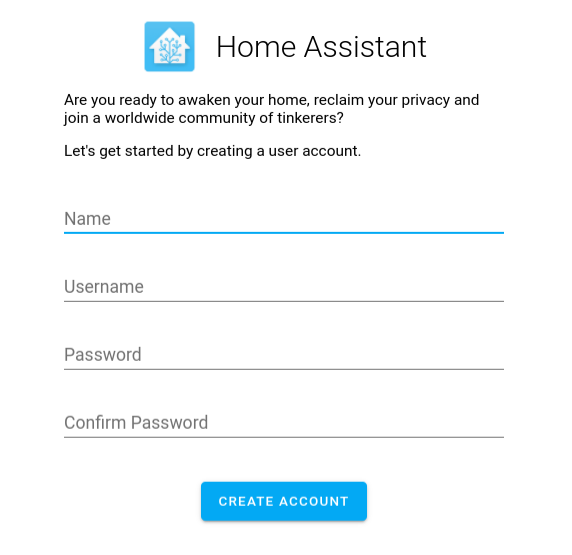
That address showed me the onboarding page … and from there, I followed the instructions again.
on Rasberry Pi 4
Next up, I needed to set up devices. I knew I’d need to move off Wink eventually but I didn’t want to disrupt my existing home automation. It is no fun when you can’t turn your lights on.
So I decided to experiment with some new smart devices. I connected a Zigbee plug to my controller, and was able to turn a small fan on and off with my phone. But that’s another story for another day…